How to create a clean / worn material system for tiling and trim sheets inside UE4
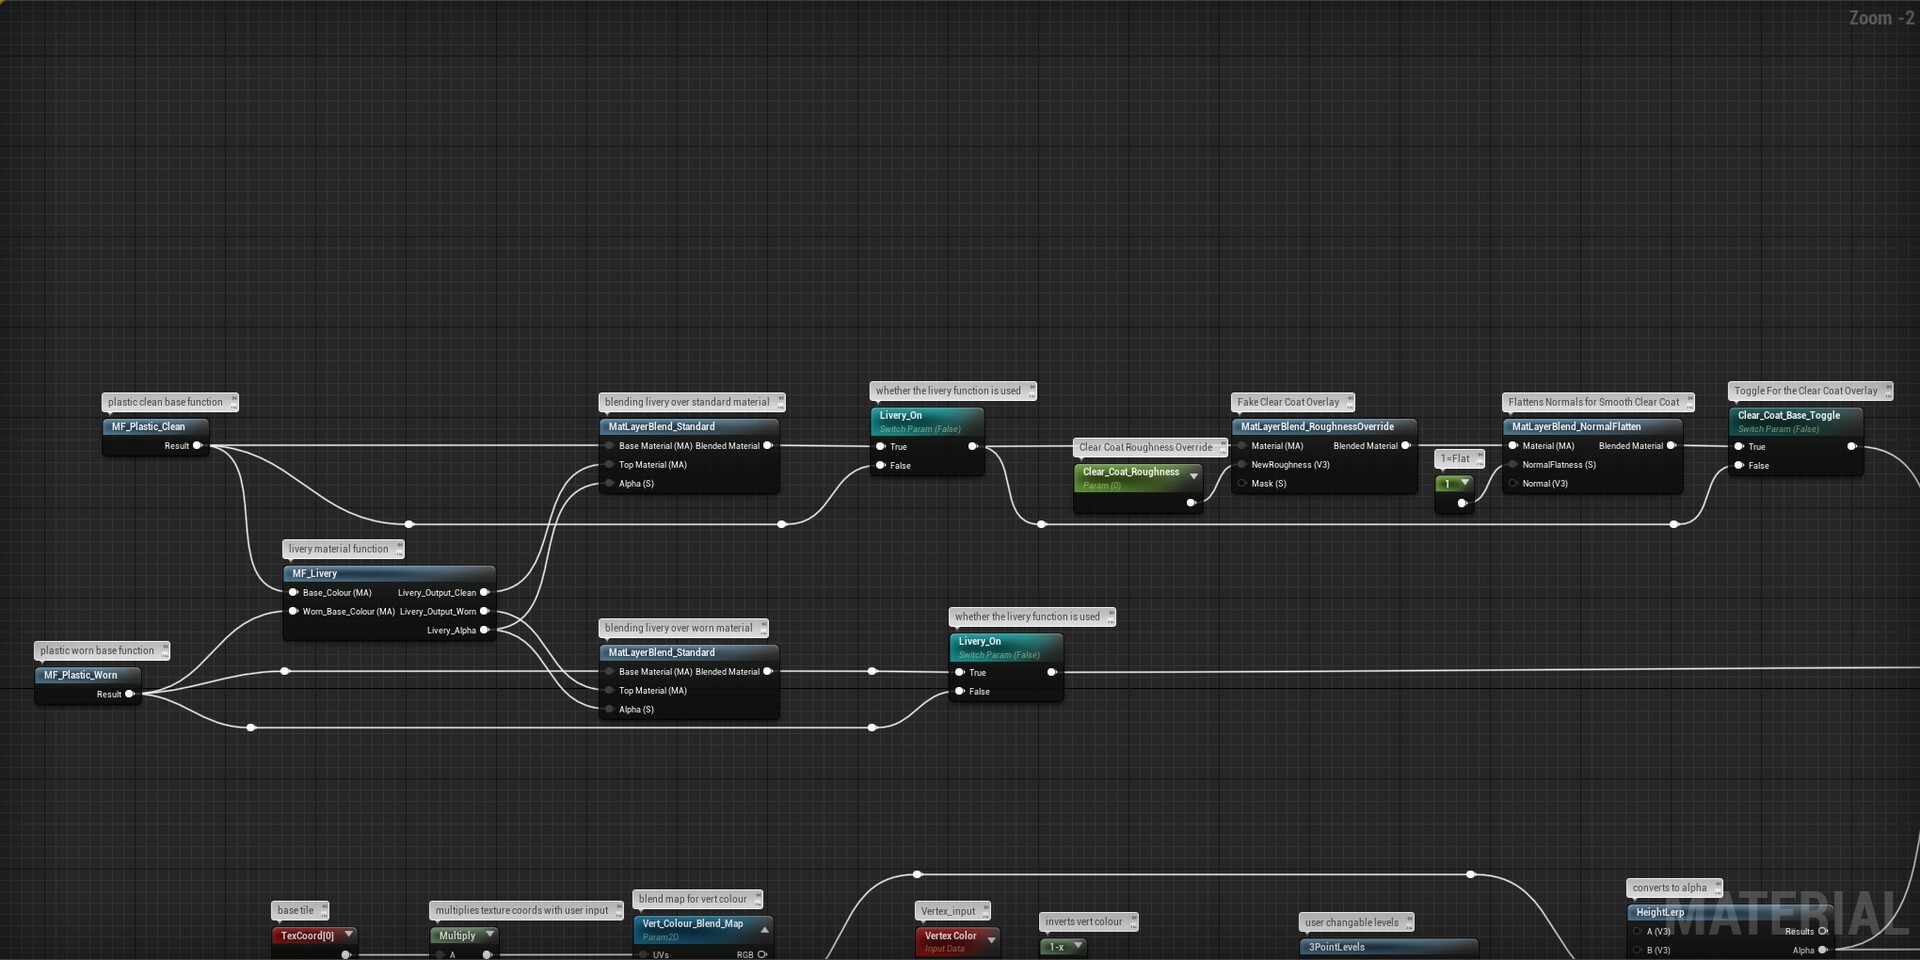
Inside UE4 the first thing you will want to do is create two material functions; These will act as the base layers for the material system and will hold the base maps for both worn and clean versions. The functions themselves should look fairly simple as they are only being used to drive the base functions. So things like base colour tints, roughness and metallic value sliders and a normal intensity setting are all super useful, along with the texture coordinates tiling parameter so we can change the tiling if we need to.
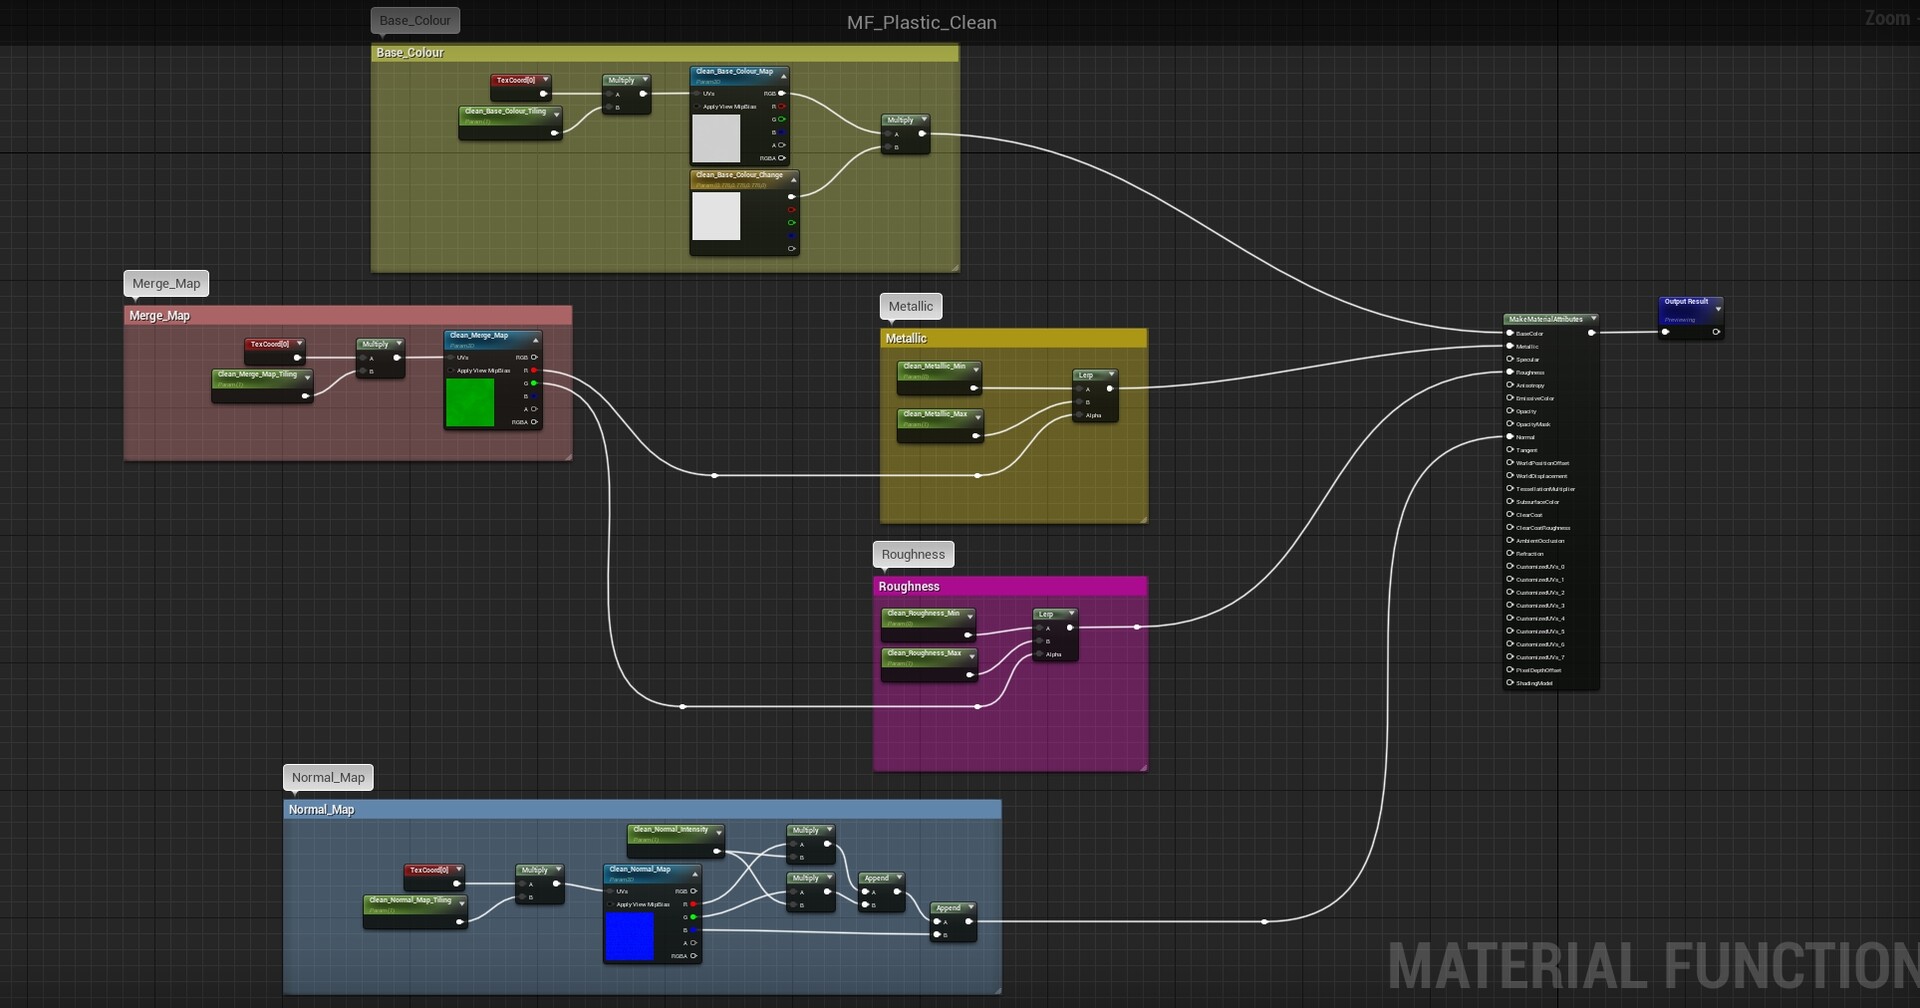
The worn function should look similar however I did find that if the clean and worn versions both had "roughness_max" as a parameter, ue4 would think they are the same and only use one, so I added "clean_" and "worn_" to the parameters to stop this, I believe the material layer system would stop this from being an issue but I haven't used it on a project yet!

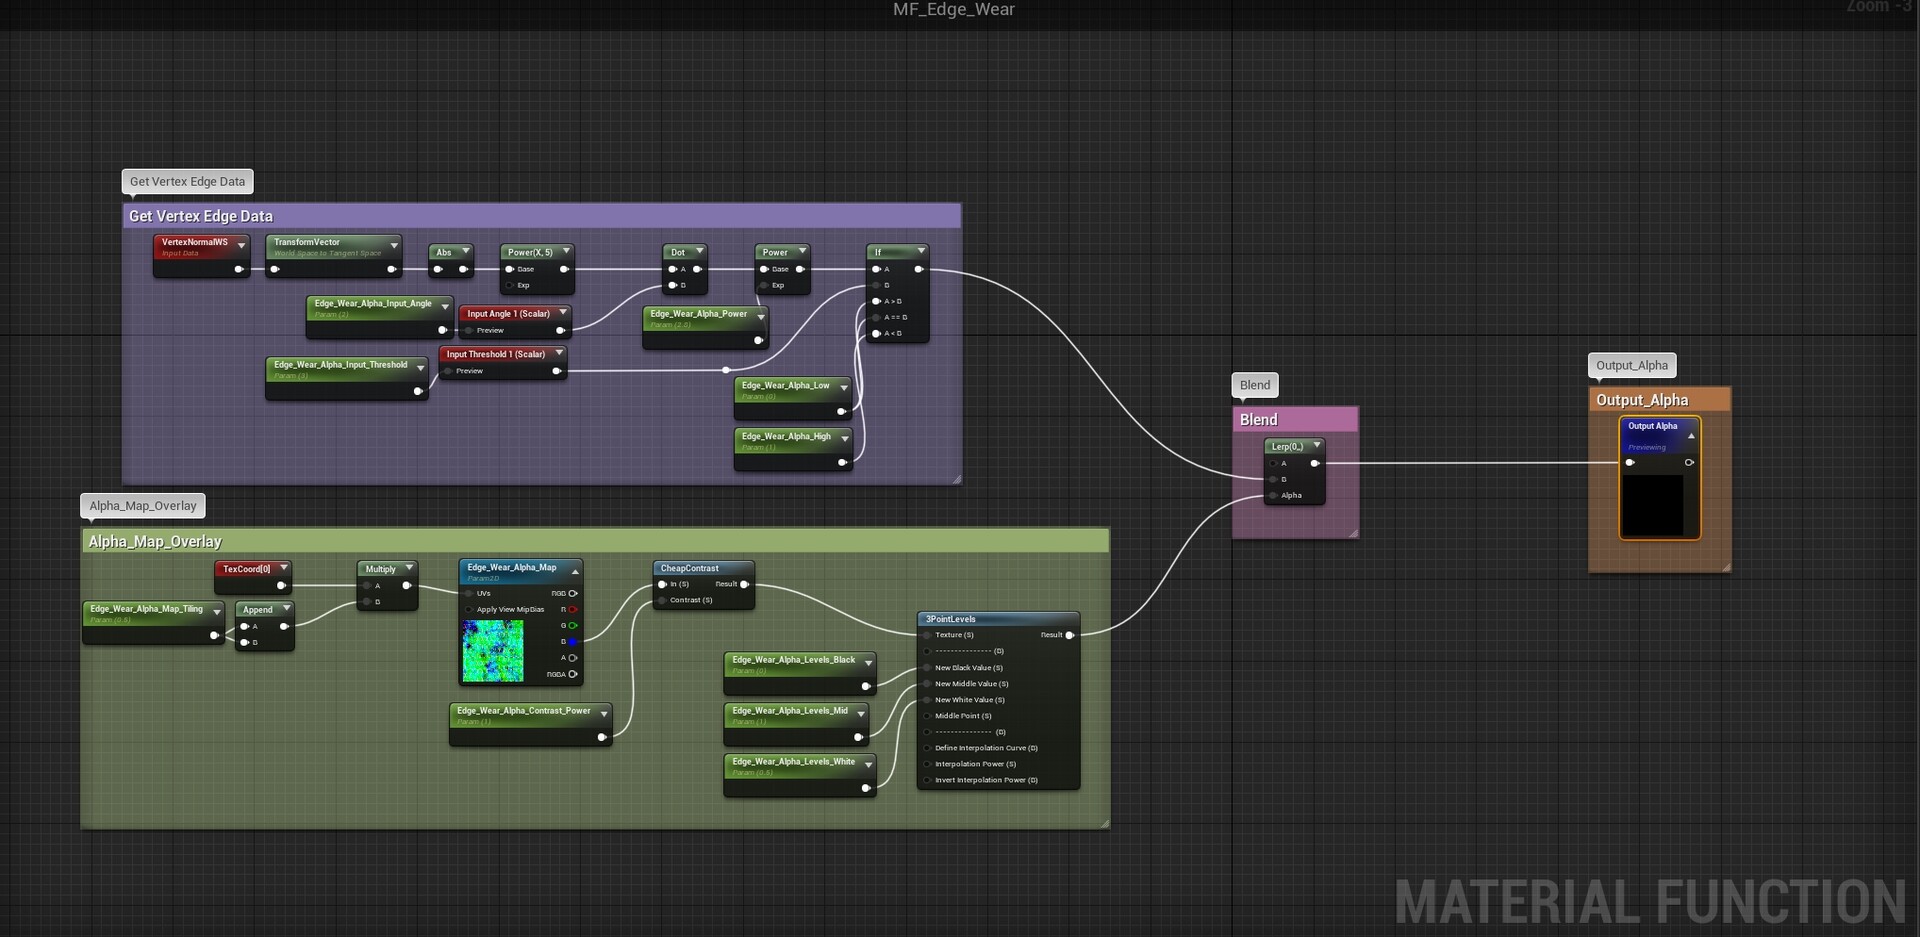
This function controls the procedural edge wear used in the project; This still needs refining but it allows you to use totally tiling materials and still get the edge wear and damage you'd find on a baked model. This basically runs off edge angles so the sharper the edge the more edge wear will turn up, you can also link it to vertex painting so the edge wear only shows up where you paint the worn version of your paint.
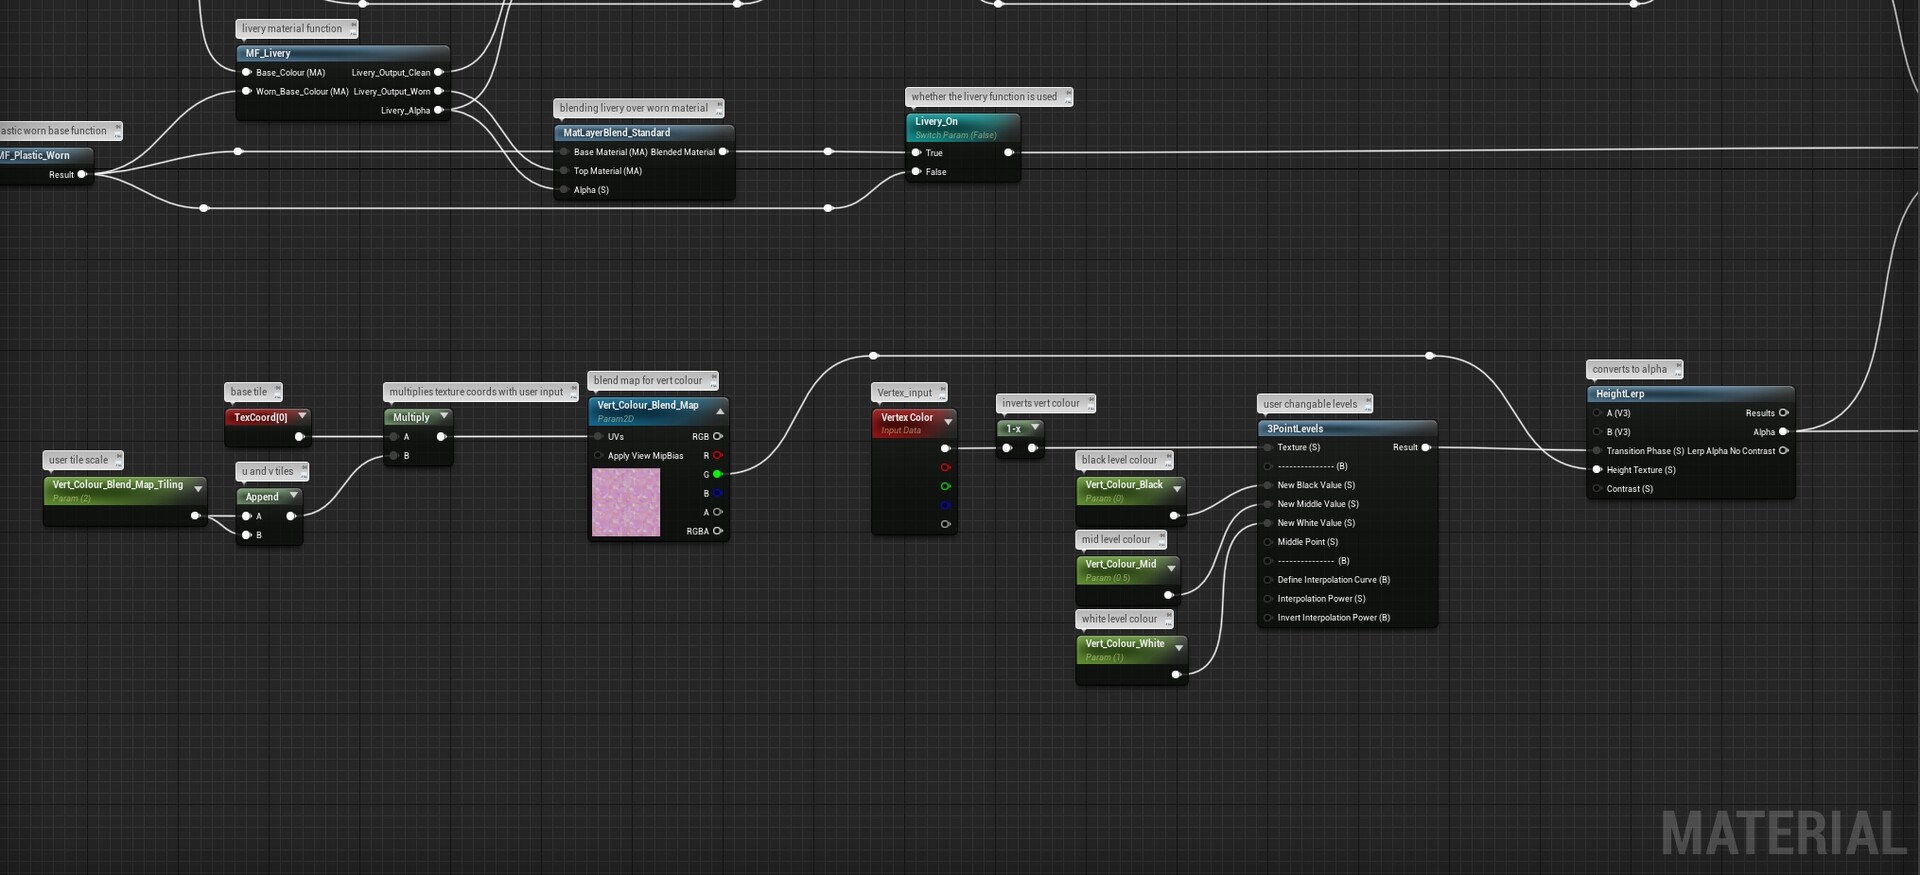
The vertex painting setup for this is fairly simple as it just uses the colour node, you have the ability to paint different channels for different things like dirt, damage etc but I wanted to keep it fairly simple haha. You have the vertex blend map tiling node going into the height texture input of the height Lerp node; This helps to break up the vertex painting on the model by using the map as an alpha mask.
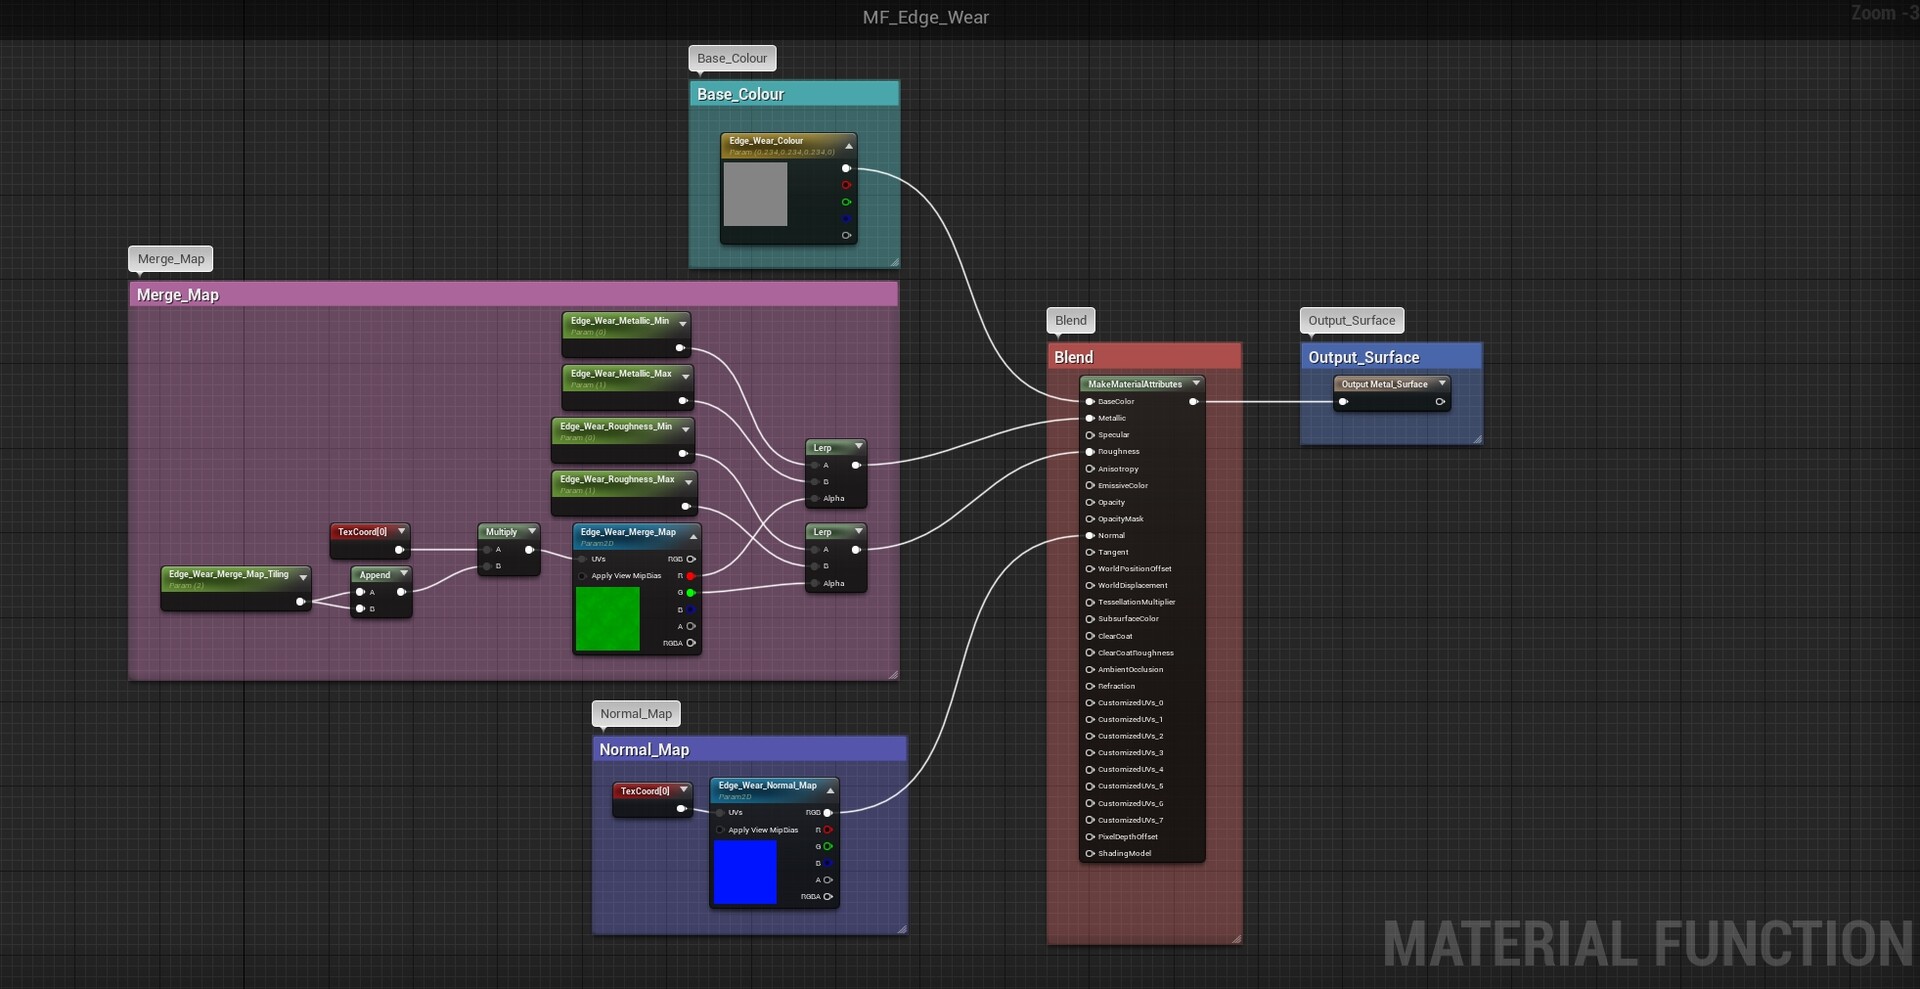
This shows the clean and worn versions being blended together using the vertex colour as an alpha, with the same thing happening for the edge wear function too, if you weren't to use the vertex painting to alpha it out the edge would show up all over the model and that doesn't give you much control at all!
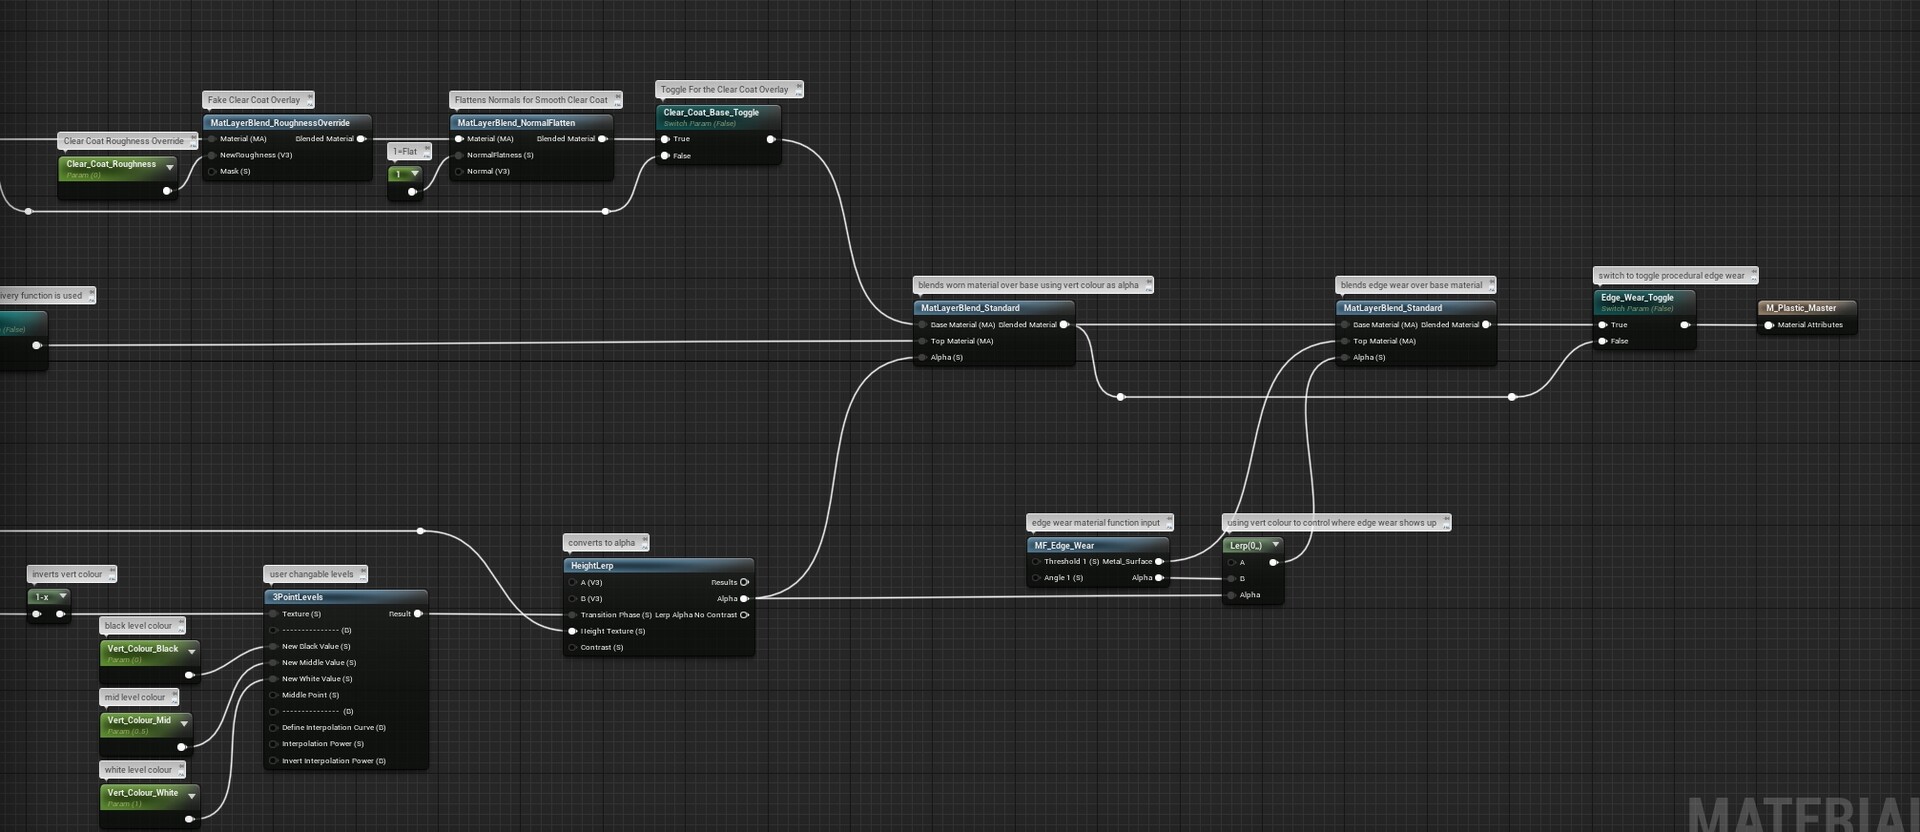
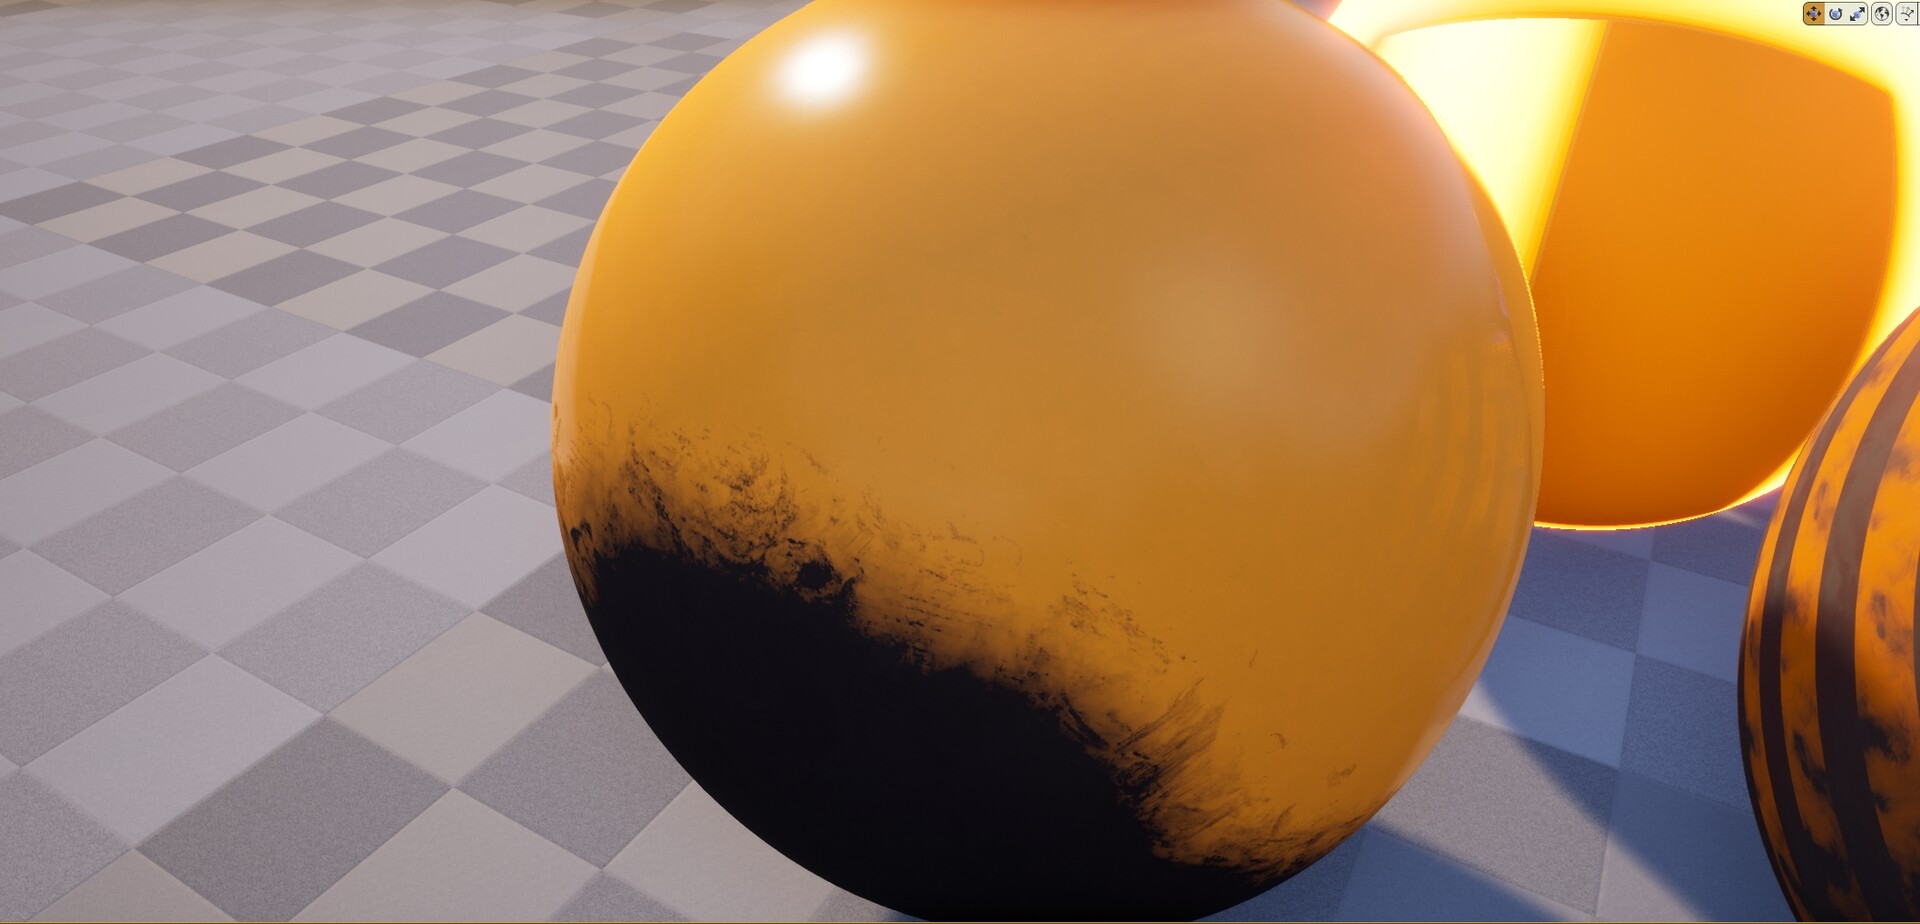
And this is the result, the setup allows you to have clean and worn maps controlled by vertex painting along with things like dirt and grime, you can add to this by blending the dirt by the normal of any panels you have in the map so the dirt shows up in the recesses first.